How to Create and Configure FTP Server on Windows using IIS
This article describes how to Create and Configure FTP Server on Windows using IIS
Step 1: Install File Transfer Protocol (FTP) Service
To install IIS on Windows Server 2016 by using the GUI,
1. On the Start page, click the Server Manager, and then click OK
2. In Server Manager , Click Add roles and features, then following window will open. Click Next
4. On the Server Selection page, select Select a server from the server pool, select the name of your computer, and click Next
5. On the Select Server Roles page, select Web Server (IIS), and then click Next. In the Internet Information Services (IIS) dialog box, select the File Transfer Protocol (FTP) Service check box and click Next.

6. On the Confirm Installation Selections page, Click Install
7. Installation Completed

Step 2: Configure FTP Server
1. On the Start page, click the Server Manager, and then click OK. In Server Manager click Tools menu and select Internet Information Service (IIS) Manager
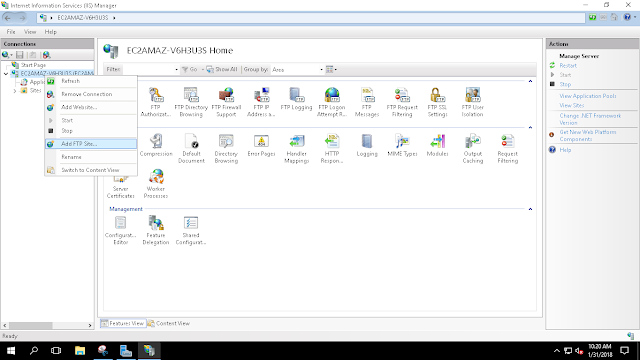
2. On IIS Manager, right click on sites and select Add FTP Site

3. On the Site Information page, add your unique ftp site name and physical path. Click Next to open the Binding and SSL Settings page.

4. Under Binding, add IP address and port . check Start FTP site automatically box if you want to start the site automatically

5. Under Authentication, select the authentication method or methods that you want to use.
Click Finish and test FTP Server

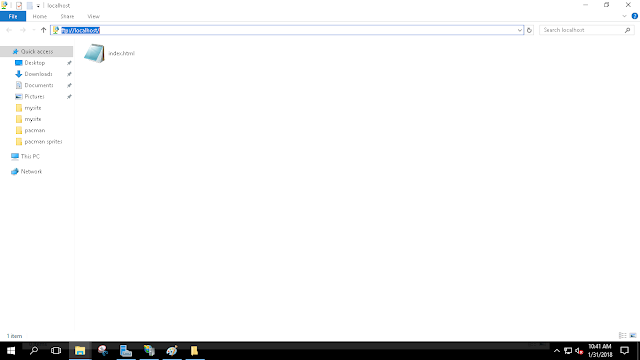
6. Test your FTP Server : ftp://localhost:21


No comments: